How to Set Up a Staging Website Before Going Live

A broken checkout, missing image, or plugin conflict should never surprise customers. Learning how to set up a staging website before going live gives you a private copy where mistakes stay invisible and reversible.
I treat staging as a controlled release environment, not just a duplicate site. It must match production closely, remain isolated from customers, and support a safe path for publishing tested changes.
What a Safe Staging Website Must Do
A useful staging site should copy the production theme, plugins, code, PHP version, and important configuration. However, it needs separate files, a separate database, and test credentials for external services.
Managed hosts often provide independent production, staging, and development environments. WP Engine states that its environments operate independently, even when grouped under one site account.
My isolation test is simple. A staging action must not alter a live order, email a customer, charge a card, publish content, or appear in Google. If one outcome remains uncertain, the setup is incomplete.
Choose a Staging Setup Method

Understanding how to set up a staging website before going live starts with choosing the method that fits your website and technical experience.
Managed Hosting
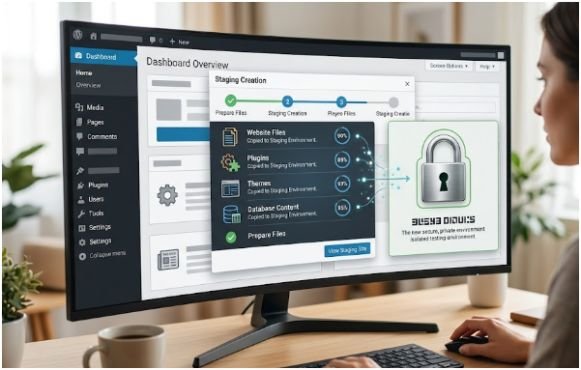
This is usually the easiest option. Open your hosting dashboard and find “Staging,” “Create Environment,” or “Clone Site.” Create the environment, name it clearly, and copy production into it.
Some hosts support full or selective copies. Selective deployment matters when production continues receiving orders, form entries, comments, or new posts.
I prefer this method for business websites because the host usually handles server configuration, database cloning, access permissions, and deployment controls.
WordPress Plugin
A staging plugin works when your WordPress host lacks built-in staging. Install a reputable cloning plugin from the official WordPress directory, create a staging copy, and choose which files and database tables to include.
Large media libraries can consume storage and increase cloning time. When the plugin allows exclusions, I leave out unchanged media files but verify that images still load correctly.
Check how the plugin’s “push to live” feature handles the database. Replacing the complete live database can erase content created after the staging copy was made.
Manual Subdomain
For a custom website, create a subdomain such as staging.example.com, assign a separate document root, and create a new database.
Copy the files through SFTP, SSH, or File Manager. Export the production database and import it into the staging database.
Update wp-config.php, .env, database credentials, site URLs, API endpoints, cookie domains, and cache settings. Use this route only when you understand the server stack or have reliable developer support.
How to Set Up a Staging Website Before Going Live Step by Step
Back Up Production
Before cloning, create a current backup of the database and website files. WordPress recommends backing up its database, all site files, and the .htaccess file. It also advises verifying that the backup is usable.
Keep at least one recovery copy outside the production server. A server-level failure could affect both the live website and locally stored backups.
Clone Files and Data
Clone the website using your host, plugin, or manual process. Confirm that staging points to its own database before making changes.
I perform a simple isolation check by editing something harmless, such as the site tagline. If the production website changes too, both environments share a resource and must be separated before testing continues.
The clone should use the same major software versions as production. Testing against a different PHP version, framework version, or server configuration can produce misleading results.
Lock Down the Staging Site
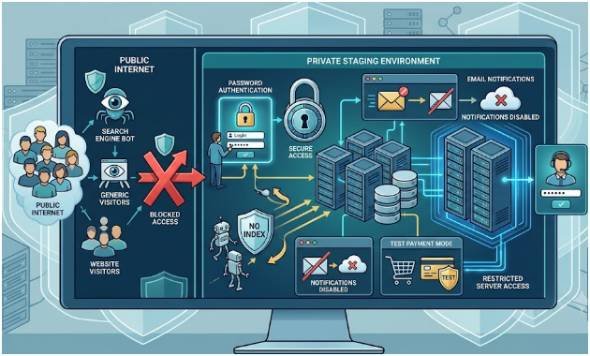
Password-protect the staging directory before sharing the URL. cPanel’s Directory Privacy feature can place a selected directory behind authentication.
Add a noindex directive as a second layer. Do not rely only on robots.txt. Google explains that robots.txt manages crawling rather than guaranteeing removal from search. It recommends noindex or password protection for pages that must stay out of Search.
This distinction matters. When a crawler cannot access a page, it may never see the page’s noindex directive.
Also remove the staging domain from XML sitemaps, analytics reports, advertising feeds, and internal links on the production website.
Neutralize Live Services
Anyone researching how to set up a staging website before going live should treat integrations as a major risk.
Disable outgoing email or route every message to a testing inbox. Check contact forms, password resets, order notices, newsletters, membership alerts, and CRM automations.
Switch payment gateways to test mode. Stripe’s sandbox environment supports integration testing without making real charges or moving money.
Review scheduled tasks as well. WordPress uses WP-Cron for time-based actions, which may run when pages load. Disable or redirect jobs that publish posts, renew subscriptions, sync inventory, generate invoices, or send reports.
Webhook endpoints, shipping integrations, accounting tools, and inventory systems should also use staging credentials or temporary test destinations.
Test Complete User Journeys
The safest answer to how to set up a staging website before going live includes testing real outcomes, not just checking how pages look.
Test navigation, internal search, forms, logins, account recovery, downloads, redirects, consent banners, analytics tags, and custom 404 pages. Use mobile and desktop devices, plus at least one browser outside your usual choice.
For ecommerce websites, test successful and declined payments, coupons, taxes, shipping zones, refunds, stock changes, customer accounts, and confirmation messages.
Run PageSpeed Insights on the homepage and important templates to identify mobile and desktop performance problems.
I record each test with five fields:
- Feature tested
- Expected result
- Actual result
- Responsible person
- Final status
This small release log prevents missed checks and creates accountability. Memory is not a dependable deployment system.
Deploy Selectively
Create another production backup immediately before deployment. Then publish only the files, code, or settings that passed testing.
My safest rule is database down, code up. Pull current production data into staging when realistic information is needed, but move tested code toward production. WP Engine recommends this direction because an older staging database can overwrite newer production data.
Place the live website into maintenance mode only when the deployment requires it. Long maintenance periods can interrupt sales, lead generation, and customer account access.
After deployment, clear application, server, browser, and CDN caches. Then test the homepage, one conversion page, a form, login, checkout, analytics, and server error logs.
A Safer Ecommerce Deployment Example
Consider a U.S. online store that clones production on Monday. Customers place 180 orders while the team changes the checkout design on staging.
On Friday, the team pushes Monday’s complete staging database into production. The redesigned checkout appears, but the 180 newer orders disappear because the older database replaced the current one.
This is why how to set up a staging website before going live must include a data strategy.
I would deploy the tested theme, plugin, and code changes without replacing live order tables. If a database change were essential, I would migrate only the required schema or settings after creating another backup.
Selective deployment requires more planning than pressing a single button. It also protects customer records, revenue data, inventory levels, and support history.
Common Staging Mistakes
The first mistake is treating staging as a backup. Staging contains changing and sometimes broken code, so it cannot replace a separate recovery copy.
The second mistake is trusting a hidden URL. A difficult-to-guess web address is not access control. Use authentication and noindex.
The third mistake is testing with live payment keys, email delivery, webhooks, or scheduled jobs. These services can trigger real customer actions.
The fourth mistake is pushing the complete database. That can overwrite orders, leads, accounts, comments, appointments, and content created after cloning.
The fifth mistake is allowing staging and production to drift apart. Refresh staging before major testing when the live environment has received important code, configuration, or content changes.
The final mistake is skipping post-launch checks. A successful file transfer does not prove that checkout, forms, analytics, caching, or redirects still work.
Ship It Without the Launch-Day Drama
Knowing how to set up a staging website before going live turns publishing from a gamble into a controlled release. Build an isolated copy, lock it down, disable production actions, test complete user journeys, and deploy only what the live website needs.
My final move is always a five-minute smoke test after launch. Test the action that makes the website valuable, not only the homepage. A polished design means little when the lead form or checkout quietly fails.
Frequently Asked Questions
1. Can I set up a staging website for free?
Yes. Some WordPress plugins offer free cloning, although advanced deployment features and additional storage may cost extra.
2. Should staging use a subdomain or subdirectory?
Either can work, but a separate subdomain or managed environment usually makes isolation and access control easier.
3. How do I prevent Google from indexing staging?
Use password protection and a noindex directive instead of depending only on a robots.txt disallow rule.
4. How often should I refresh a staging website?
Refresh it before major work or whenever production data has changed enough to make testing unrealistic.